Delegation
Cygna platform collects data in your organization so that you can be sure that no breach can occur. If distributed freely, such data can be a huge security issue of its own since internal attackers can use it to their own advantage. To secure collected data and ensure that only authorized personnel can review it and update configuration, the Cygna platform enables you to delegate access within the product.
As a security rule of thumb, the most strict model is enforced by default—only the user who installed the Cygna console can operate it. This user is assigned the Global administrator role in the product and can grant and revoke permissions. Unauthorized users as they log in will only see a product home page without any configuration details or data.
Built-in Roles
Cygna Auditor comes with a set of built-in roles. These roles cannot be removed or modified. To view available roles, navigate to Configuration / Delegation / Roles.
- The most powerful role is Global administrator. It provides access to all product functionality including role delegation. The first user to install Cygna Auditor is granted the Global administrator role.
- For each audit source, three roles are available:
- Owner—provides extensive permissions to view data and manage configuration
- Contributor—provides permissions to partially manage configuration and view data
- Reader—provides permissions to view data
For example "Active Directory Owner", "Microsoft 365 Reader".
Creating Custom Roles
As an administrator, you can create custom roles with atomic permissions to ensure that users are given access to the exact amount of data they need based on your company's security guidelines and policies.
Cygna Auditor enables you to create new roles from scratch or clone an existing role and modify it.
To create a new role:
- Navigate to Configuration / Delegation / Roles.
- Do one of the following:
- To create a new role: click
 .
. - To copy and then modify an existing role: click
 next to a role and select Clone.
- To create a new role: click
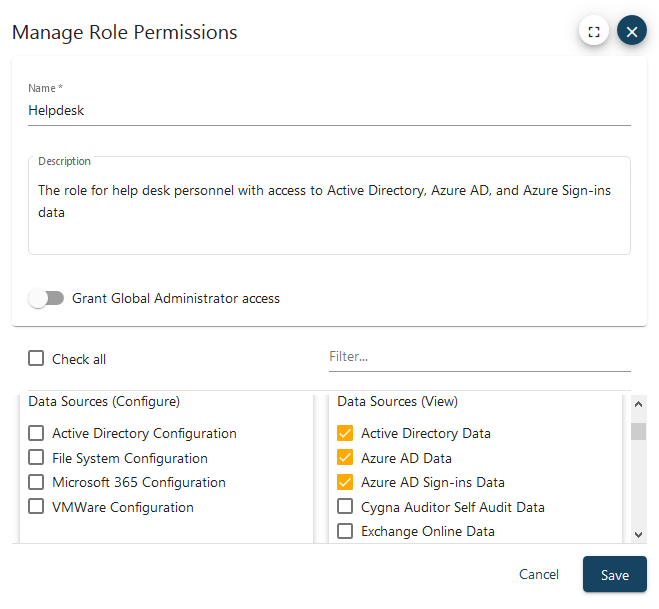
- In the Manage Role Permissions window:
|
FIELD |
DESCRIPTION |
|---|---|
| Name, description |
Add the role name and a short explanation, for example: "Helpdesk — The role for helpdesk personnel with access to Active Directory, Microsoft 365, and Azure Sign-ins data". |
| Grant Global Administrator access | Enable with option if you want to create a duplicate for the global administrator role. If you enable this option, you won't be able to pick permissions individually, all permissions will be enabled for this role. |
| Permissions section |
Check permissions you want to grant. Note: If you create a powerful role, you may opt-in to Check all permissions and then clear those you don't need. |
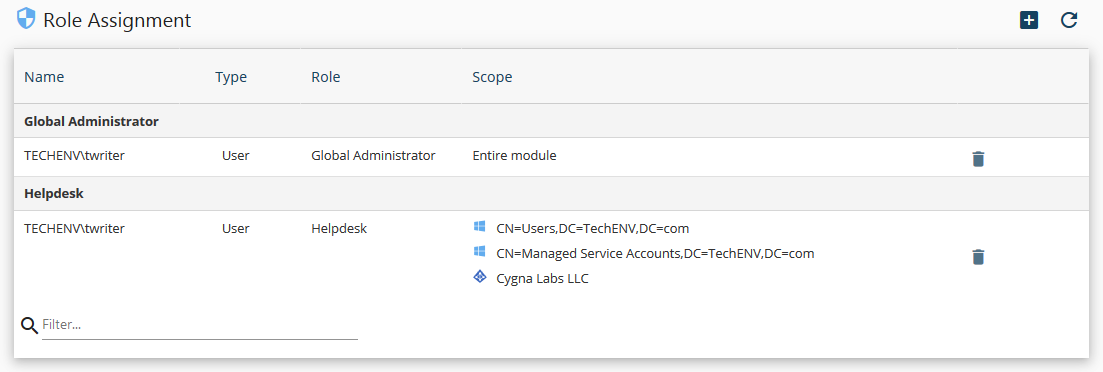
Assigning Roles to Users
- Navigate to Configuration / Delegation / Role Assignment.
- Select .
- On the Role Assignment tab:
- Select a role from the list.
- Specify if you want to assign this role to a user or a group.
- Provide a name.
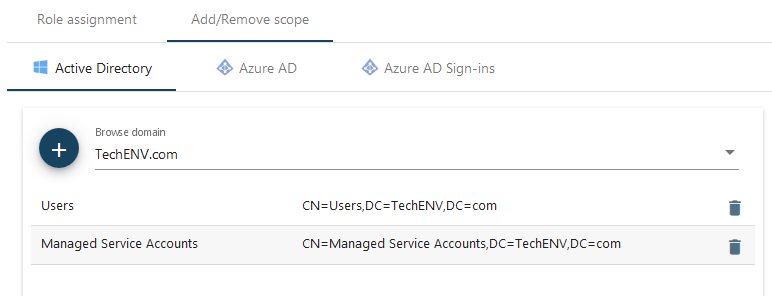
-
On the Add/Remove Scope tab, you can limit role access to specific objects within the data source module (AD domain, tenant, etc.). The scope can be as discrete as Entra ID tenant or a certain AD container (e.g., Users, Managed Service Accounts).
Note: To provide access to all objects, configure a scope and leave it blank.

- Select Save.
You can always review users with their assigned roles and rearrange them if necessary.