Create Password Expiration Alerts
Password expiry alerts allow administrators to create rules to configure password expiry notifications. The rules can specify who received a password expiry, how often they receive the notification, and whether or not an administrator is informed of the upcoming expiry. The information in the rule can also be configured to generate a report on password expiry.
This feature does not configure password expiry, only notification alerts on when passwords will expire.
You can access Password Expiry alerts in Cygna Auditing & Security Suite > Active Directory and also from Configuration > Email Templates.
To use this feature, administrators must first create at least one Expiry Notification template. Create an Expiry Report Template and a schedule if you are planning to enable the reporting on password expiry.
Create an Expiry Notification Email Template
Create an Expiry Notification to send an email to users as the password expiry date approaches. You can create an expiry notification template to customize the email message.
Note: Leave the Recipients page blank in the Notification template. Recipients will be automatically specified by the rule.
- In the console, expand Configuration > Email Templates.
- Right-click the node for the module you want to create the template for. For example, Active Directory Alerts or File System Alerts.
- Provide a name and description for the template.
- Select the Recipients tab, and then click Add to enter recipients.
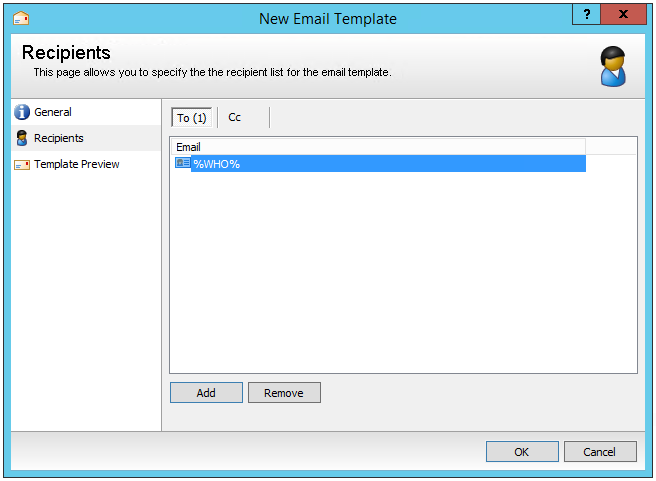
Administrators can enter the %WHO% wildcard to send an email to a user that exists in Active Directory. This email notifies the user of the changes they made.
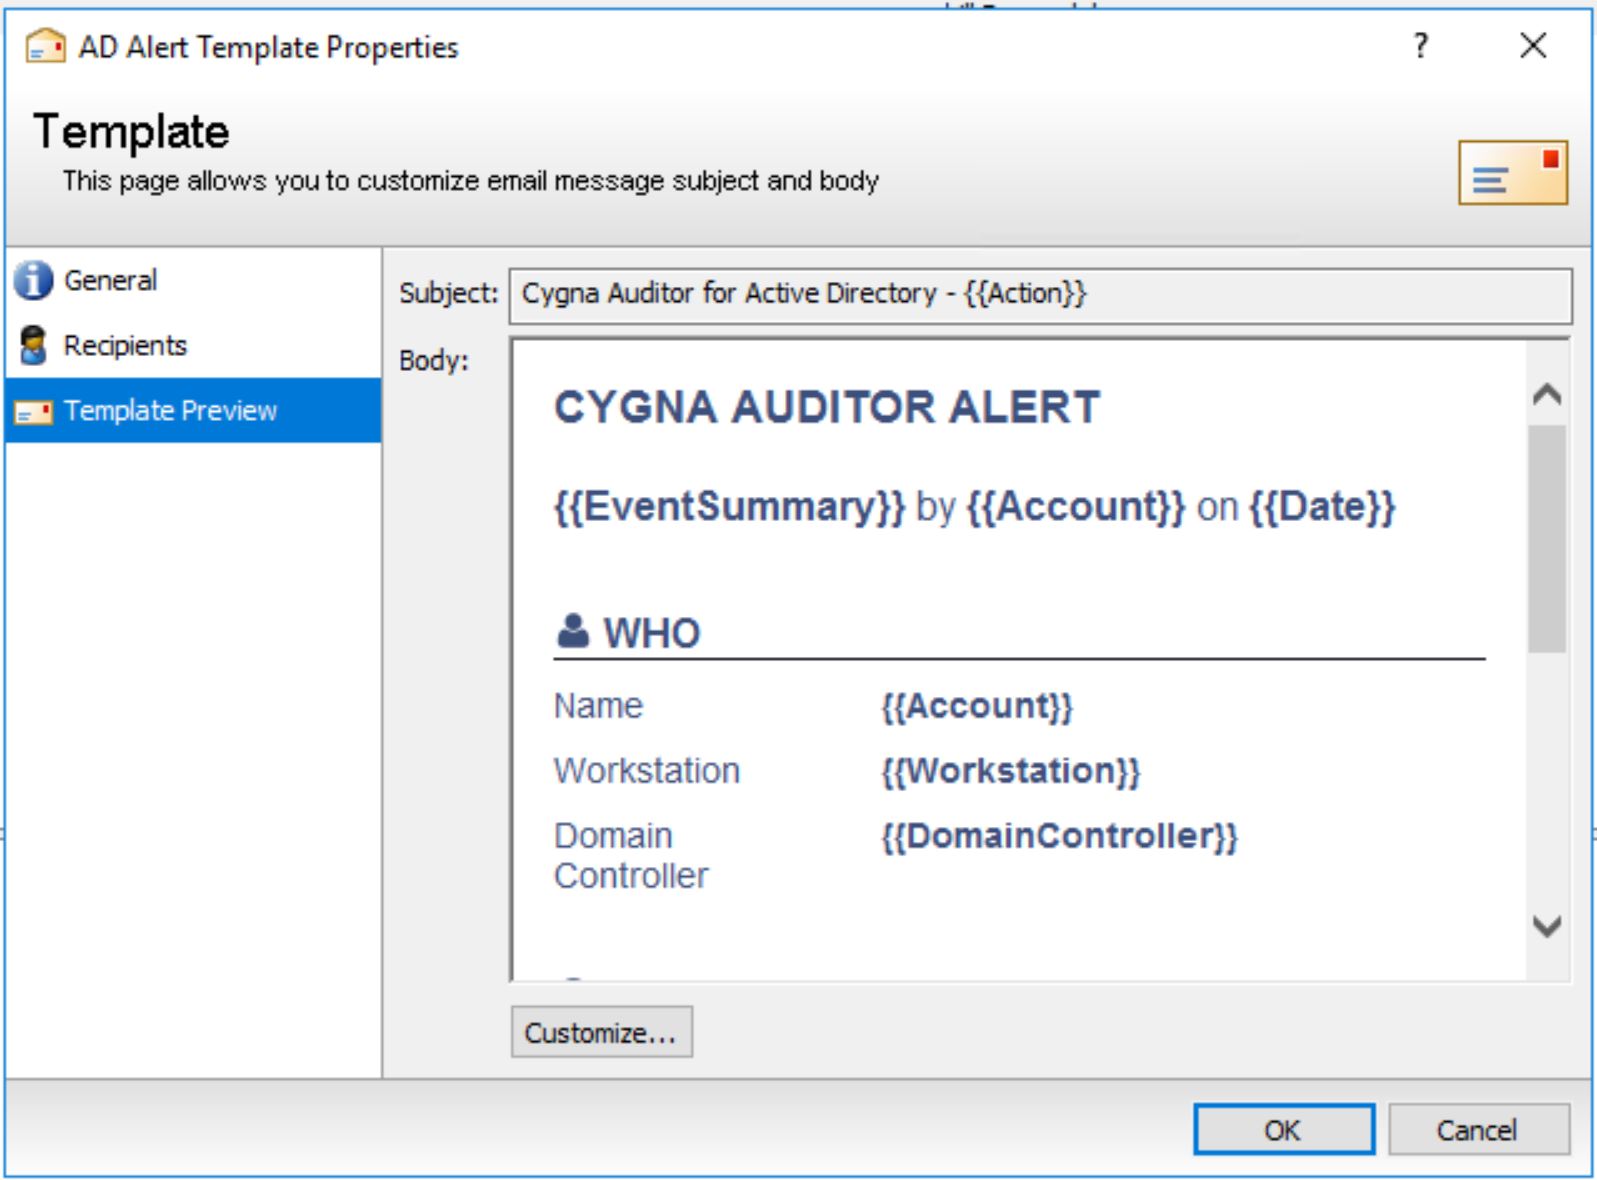
- Select Template Preview.
- Click Customize to change the template.
- On the HTML tab, you can modify the text in the window or you can click Source to modify the HTML code. You can also import and export .html files. The Import and Export buttons are enabled when you click Source.
- Click OK.
- After you finish configuring the template, click OK.
Report Templates
Report templates are configurable and customizable templates which provide a detailed report that can be emailed to a recipient.
- Expand Configuration > Email Templates > Password Expiry Alerts.
- Right-click Password Expiry Reports, and then select New > Email Template.
- Enter a name and description for the template.
- Select Recipients and enter the email addresses of the users that will receive the report.
- Select Template Preview.
- Click Customize.
- On the HTML tab, you can modify the text in the window or you can click the Source button to modify the HTML code. You can also import and export .html files. The Import and Export buttons are enabled when you click on the Source button.
- Once your changes are complete, click OK and then OK again in the New Email Template dialog box to save changes.
Configure Password Expiration Alert Rule
- Expand the Active Directory node.
- Right-click Password Expiry Alerts, and then select New > Password Expiration Rule.
- Provide a name and description for the rule.
- Select Scope.
- Click Add and select your container, group, or user.

- After you add an object, select either Subtree or One Level in the Options column.
- If necessary, select the Exclusions tab to add users you want to omit from the rule.
- Select Schedule.
- Click Add.
- Configure your schedule settings and click OK. You can add multiple schedule rules. On each scheduled notification, the administrator can set a notification to be sent to a manager. This will copy Managers on the same notification sent to the users.
- Select Email Settings.
- By default, the email attribute is set to mail. However, administrators can override and choose another Active Directory attribute as an advanced option. Click the browse button to select an AD attribute if required.
- Click the browse button to select an email template. This template is configured with the information displayed to the notification recipients. Click Details to edit the existing template.
- Select Report. The report page allows administrators to configure a summary report to send according to the schedule configured in the rule. It will send a report to the person who is specified in the Email template.
- Check Send summary report to enable the settings on this page.
- Select a schedule and an email template, and then click OK. Click Details to edit the template if required.
Note: The initial email of the report will display only the first 30 users. The full report is attached to the email in CSV format.