Appendix A: NetApp Filer Audits
Overview
This section details the steps to enable File System auditing on a NetApp Filer. It assumes the NetApp Filer is accessible (through CIFS) from the system that Cygna File System Auditor for NetApp is being installed on. Once installed, you must create a filter, add it to the agent and create an audit view to access the data.
Enable Auditing
Part One: Install File System Auditor for NetApp
- On the system that will be running the service, run File System Auditor for NetApp.msi from the \Packages folder.
- Accept all default settings.
- On the Service Account page, specify an account to run the service (for example, Management Server service account).
- Click Install and complete the installation.
Note: The system chosen to run the service will not generate audit events.
Part 2: Configure the File System for NetApp service
- Run the Configure NetApp Filers application.
- Click Add and enter the Filer, Account and Password information of the filer being audited and an account on the filer with sufficient access to audit the shared file systems.
- Click Search. Then select the filer and click Ok.
- Add additional filers or click Ok to close the tool.
- Start the File System Auditor for Netapp service in the Services management console.
Create the Filter
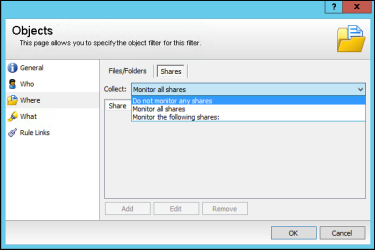
- You must create a filter for the agent. Under the Where tab you must select Shares and choose one of the three choices from the drop-down menu.
- Under the What tab you must choose the criteria you wish to audit. After you have configured the filter, select OK.
- Right-click the NetApp server in the Management Console, and then select Properties.
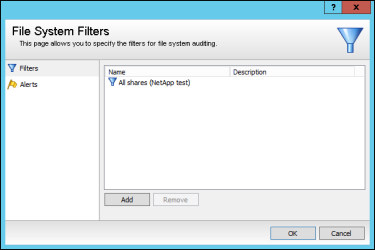
- Under the Filters tab, click Add.
- Select the filter and click OK.
- Restart the service from the Service management console (services.msc). This ensures that the filter is applied to the agent.
Create Audit Views
- Right-click the Audit Views node and then select New > Audit View.
- Configure the Audit View to your needs. Under the Computers tab, ensure you add the NetApp server. Do this by selecting Add and choosing the server by searching the name.
- After you configure each tab to your specifications, select OK.
Enable SSL
File System Auditor for NetApp supports SSL. You must manually create a folder for FSA_NetApp. The following registry key values must be added.
Note: These steps are to be done on the systems running the File System Auditor for Netapp service. HTTPS is enabled by default. Users only need to make the changes if a different port is needed.
Key: HKEY_LOCAL_MACHINE\SOFTWARE\Blackbird\FSA_NetApp
Values: For HTTPS Connection
Name: https_enable
Type: REG_DWORD
Values: 0 = disable and use HTTP only, 1 = enable and use HTTPS only
Default: The default behavior is to use HTTPS. An absence of the https_enable value is the same as the value 1 being set for https_enable. The ONLY way to force HTTP only is to define this value and set it to zero.Name: https_port
Type: REG_DWORD
Values: Any valid port from 1 to 65535
Default: The default value is 443. The absence of the https_port value is the same as setting a value of 443 for https_port.
Values: For Configuration of the Port on Cluster Mode
Name: port
Type: REG_DWORD
Values: Any valid port from 1 to 65535
Default: The default value is 19191. The absence of the port value is the same as setting a value of 19191 for port.
Note: Any changes to the values in the key location requires a restart of the PBFSA_NetApp service for activation.


