Configure SQL Server Monitoring
Requirements
- Cygna Auditor for SQL Server supports Microsoft SQL Server 2005–2017 environments.
- The Management server service account needs the sysadmin role on the SQL instance to be monitored and on the Auditor for SQL instance.
- The Microsoft SQL server process, on both the Auditor for SQL database server and the database server being monitored, must run as NT Authority\NetworkService or a domain user (preferred). The syntax is: domain\username or username@domain (.\username will not work). Running the service as LocalService is not supported because it presents anonymous credentials on the network.
Add a SQL Server for Monitoring
- Start the console.
- Expand the Cygna Auditing & Security Suite node.
- Expand the Auditor for SQL Server node.
- Click the Servers node.
- Right-click in the working area and select Add Monitored SQL Server. Alternatively, right-click the Servers node and select Add Monitored SQL Server.
- To add a server, click Add.
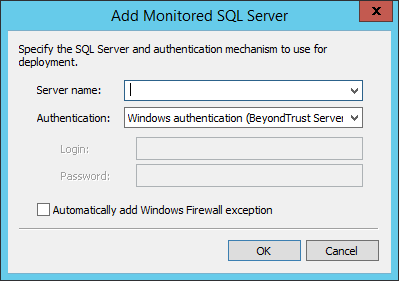
- In the Add Monitored SQL Server dialog box, complete the fields as follows:
- Server name: The name of the SQL Server instance. SQL servers on the network are available in the list.
- Authentication: Select an authentication type
for the installation of the monitor. The selected account must
be a member of the SQL Server sysadmin role.
There are three options.
- Windows authentication service credentials.
- Windows authentication (specified): Enter the login and password. If the Management Server is running as Local System, using this option will not work. You must enter credentials.
- SQL Server Authentication: Enter the login and password. Note that if this option is used, the Management Server service account is used to access the file system of the remote SQL Server. This account must have administrative privileges for the remote SQL server.
- Automatically add Windows Firewall exception: Select the check box to allow communication to and from the SQL Server.
- Click OK to add the server to the monitoring list.
- Click Add to add another server to the monitoring list.
- Click OK to start monitoring the SQL servers. The server status is displayed in the working area.
View SQL Server Status
To view the status of monitored SQL Servers:
- Expand the Auditor for SQL Server node.
- Select the Servers node.
-
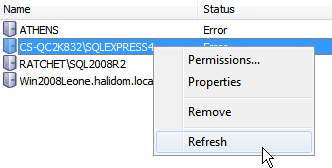
There are three status states:
- Deploying when monitoring is being set up.
- Active when setup is complete and monitoring is taking place.
- Error if an error occurs during setup.
- To refresh a server’s status, right-click the server, and then select Refresh.
View Properties of Monitored SQL Servers
To view a server’s properties:
- Expand the Auditor for SQL Server node.
- Select the Servers node.
- Right-click the server in the working area and select Properties.
-
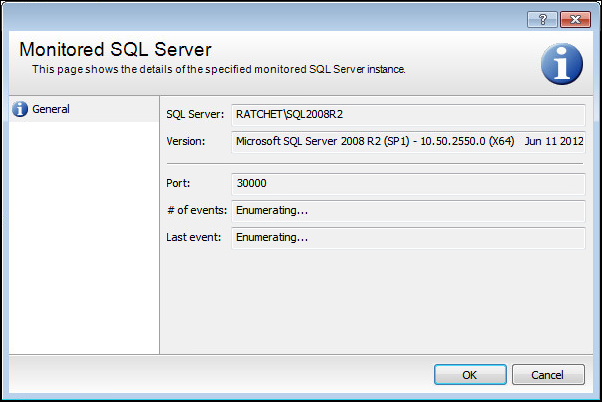
The details in this dialog box include:
- SQL Server: The name of the SQL server being monitored.
- Version: The version of the SQL server being monitored.
- Port: The port that the monitored SQL server is using to communicate with the Auditor for SQL database.
- # of events: The number of monitored events from this SQL server.
- Last event: The time of the last monitored event.
Remove a SQL Server from the Monitoring List
To stop monitoring a SQL Server:
- Expand the Auditor for SQL Server node.
- Select the Servers node.
- Right-click the server, and then select Remove.
- Click Yes.
-
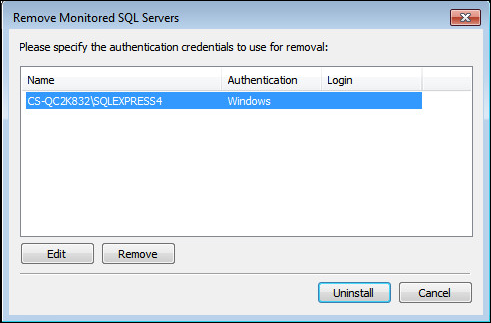
Confirm the servers to remove and the credentials used.
- Edit opens the Authentication dialog box and allows you to change the credentials. By default, Auditor for SQL uses Windows Authentication using the Auditor for SQL service credentials.
- Remove removes the server from the list to be uninstalled.
- Click Uninstall to remove the selected servers from the monitoring list.