Creating Alerts
To create a new alert:
Note: The procedure below applies to the Active Directory source. Alert creation may vary slightly for other sources.
- On the home page, pick a source.
- Select Alerts.
- Select Create to create a search-based alert.
-
Customize your search—create a search query tailored to look for the information you are specifically interested in. Make sure to use full names as filters are designed to search for exact entries (e.g., cygnalabsdemo.com\ian.rush instead of ian.rush). To retrieve all activity, keep the search filters blank.
-
On the Filter tab, specify parameters to narrow down your search results (for example, specify a user name in the Who filter to narrow down your search to activity of a specific user).
- On the Exclusions tab, specify entities you do not care about at the moment and do not want to show up in this search query (for example, a trustworthy administrators group).
- On the Actions tab, specify alert recipients.
-
- Click Save.
- In the Save Alert dialog, specify a new alert name and provide description. Set the Enabled status to "Yes" to turn on the alert. Also, you can assign tags to your alerts. e.g., security, critical, moderate risk.
After saving, a new alert will appear in the list. Later, you can update, disable, or delete your alerts.
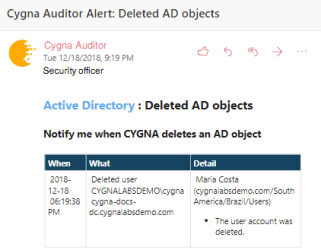
The example below demonstrates the alert email that notifies about a user being deleted in your Active Directory domain.
For more information on interpreting the data, refer to Reading Search Results.

