Tutorial: Getting Started with Active Directory—See Cygna Auditor in Action
Welcome aboard and let's get started. As you follow this tutorial, you will learn how to install Cygna Auditor and start auditing your Active Directory domain.
The cygnalabsdemo.com domain will be used as a sandbox for demonstrating the product. To see how Cygna Auditor reports changes in real life, you will be prompted to perform the same test actions in your Active Directory environment.
In this tutorial:
Step 1. Installing the Product
Step 3. Adding Domain for Auditing
Step 4. Configuring Notifications
Step 6. Seeing Cygna Auditor in Action
Step 1. Installing the Product
- Prepare two servers: a clear Windows Server 2016 with preinstalled IIS and .Net Framework 4.6 for Cygna Auditor and the server with SQL Server 2016 Standard Edition.
- Run the installation package. During the installation, the product will prompt you to provide administrator credentials to write its configuration to the Active Directory domain, will create an audit data storage and start all the necessary services.
-
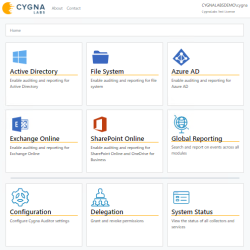
Open the Cygna Auditor webconsole—start the browser and go to localhost/cygna.

Step 2. Setting up Audit
Before you can continue with Cygna Auditor, enable auditing policies and configure other settings in your domain:
- Group Policy Management is enabled on Cygna Auditor host. The group policies Audit account management, Audit directory service access, Audit object access, Audit Computer Account Management, Audit directory service changes, Audit User Account Management, and Audit Account Lockout should be set to "Success" and "Failure". The policies Account lockout duration and Reset account lockout counter after should be set to "30 minutes" and Account lockout threshold to "5 invalid logon attempts". The policy Audit Kerberos Authentication Service should be set to "Failure".
-
Allowed remote access to DC's event logs with Remote event log management (RPC-EPMAP) and Remote event log management (RPC) firewall rules.
- ACLs configured for Default naming context and Configuration naming context.
For detailed instructions, refer to Configuring Settings for Active Directory.
This is step is essential to enable Cygna Auditor to collect reliable and complete audit data.
Step 3. Adding Domain for Auditing
- On the Cygna Auditor home page, select the Active Directory / Configuration / Domains.
- Click Add.
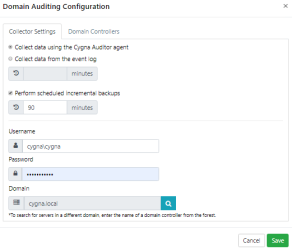
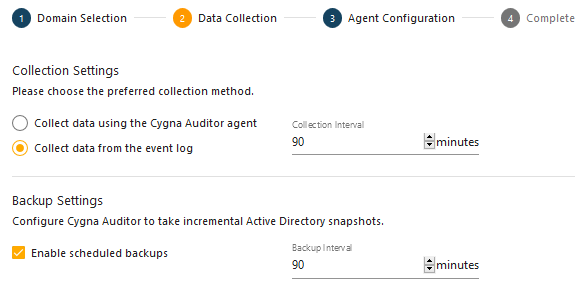
-
Select agent as a data collection method, provide administrator credentials, and then proceed to the Domain Controllers tab to select DC where the agent will be installed.
The domain you added will appear in the domain list.
Step 4. Configuring Notifications
(This step is optional and is only required if you want to receive alert notifications.)
- On the Cygna Auditor home page, select System Configuration / System and provide your SMTP server details. Cygna Auditor will use these settings to send alert emails.
-
On the Cygna Auditor home page, select Active Directory / Alerts, and then click Create.
-
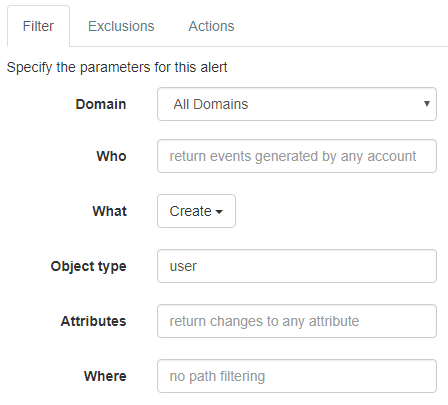
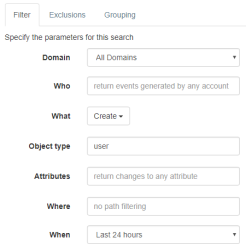
Complete the fields in the Filter tab as follows—set the What filter to "Create" and Object type to "user".

- In the Actions tab, specify your email address as recipient. Click Save to add the alert.
-
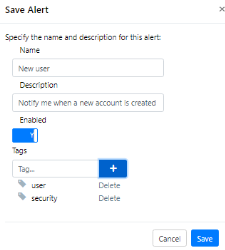
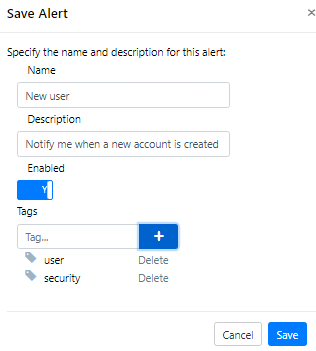
In the Save Alert dialog, specify the alert name (e.g., New user) and description. Also, you can apply tags to your alert. For example:
Step 5. Making Test Changes
Make test changes in your Active Directory domain—for example, create a new user.
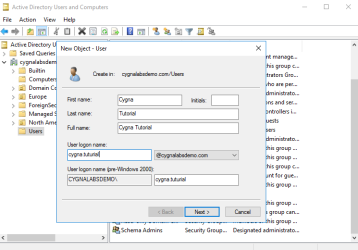
- On a domain controller, start Active Directory Users and Computers.
- Expand your domain node.
- Right-click the Users container and select New / User.
-
Create a user called Cygna Tutorial.

Step 6. Seeing Cygna Auditor in Action
After waiting for 10 minutes for Cygna Auditor to collect data and process the event, start exploring how the test change you made is reported by Cygna Auditor. For more information on product functionality, refer to Key Features.
With Cygna Auditor, you can keep track of changes in your environment. The auditing features can be used interchangeably while bringing you the same level of transparency and security. Below you can see how to achieve the same results using different product features.
- Go to Active Directory / Search.
-
Construct a search query. Set the What filter to "Create" and Object type to "user". The When interval is set to "Last 24 hours" by default. This search query will show users created during last 24 hours.
-
Click Search. Cygna Auditor will show you the following change record:
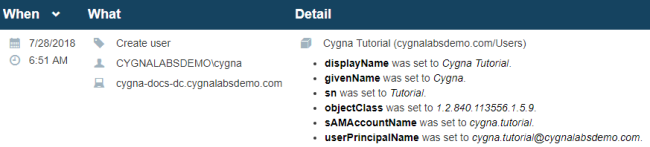
As you can see, a new user called Cygna Tutorial was added to the cygnalabsdemo.com/Users container.


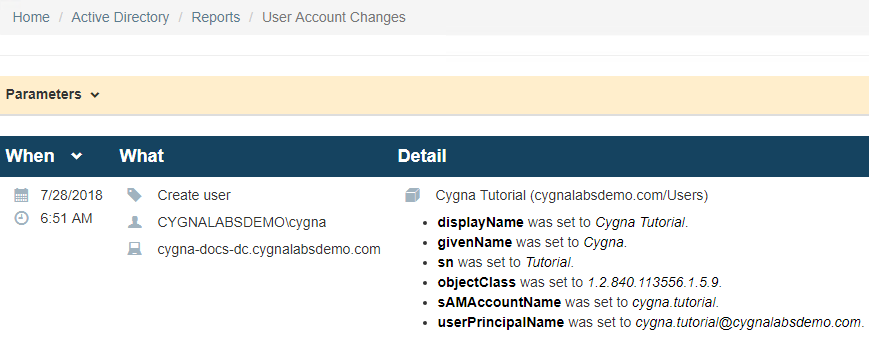
- Go to Active Directory / Reports.
-
Select the User Account Changes report and click Run.

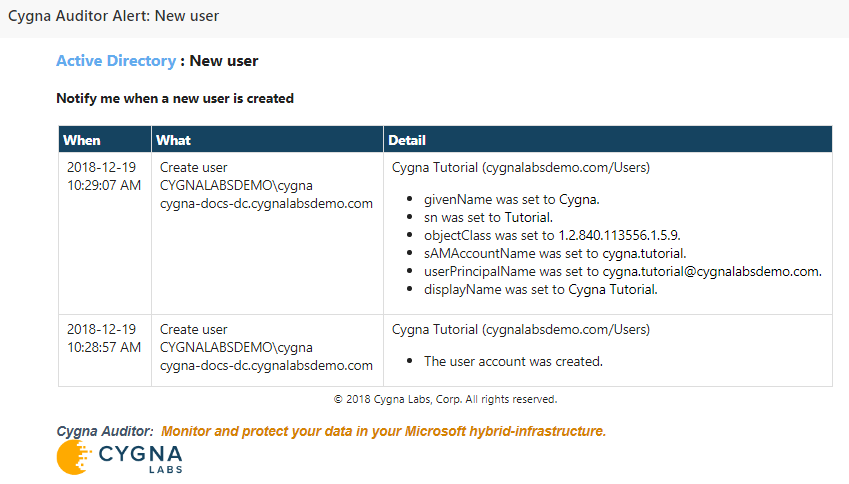
Check your mailbox to see the alert notification.
Recommended reading:
Tutorial: Getting Started with File System—See Cygna Auditor in Action
