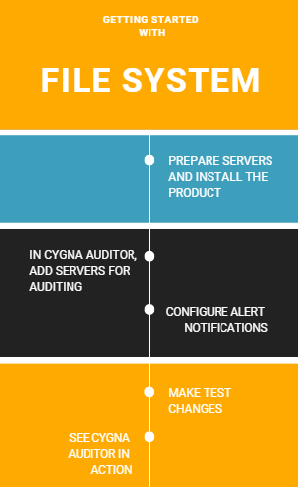
Tutorial: Getting Started with File System—See Cygna Auditor in Action
Welcome aboard and let's get started. As you follow this tutorial, you will learn how to install Cygna Auditor and start auditing files and folders on your servers.
The cygnaconsole workstation in the cygnalabsdemo.com domain will be used as a sandbox for demonstrating the product. To see how Cygna Auditor reports changes in real life, you will be prompted to the same test actions on your server.
In this tutorial:
Step 1. Installing the Product
Step 2. Adding Servers for Auditing
Step 3. Configuring Alerts and Scope
Step 5. Seeing Cygna Auditor in Action
Step 1. Installing the Product
- Prepare two servers: a clear Windows Server 2016 with preinstalled IIS and .Net Framework 4.6 for Cygna Auditor and the server with SQL Server 2016 Standard Edition.
- Run the installation package. During the installation, the product will prompt you to provide administrator credentials to write its configuration to the Active Directory domain, will create an audit data storage and start all the necessary services.
-
Open the Cygna Auditor webconsole—start the browser and go to localhost/cygna.

Step 2. Adding Servers for Auditing
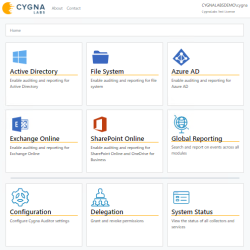
- On the Cygna Auditor home page, click the Configuration tile and then drill-down to File System / Servers.
-
Add servers for auditing. To collect data, Cygna Auditor needs to deploy an auditing service on each server you want to audit. The drivers are non-intrusive and will not affect the server operability. You can deploy a service automatically or manually.
Note: If you plan to audit Cygna Auditor application server for file system changes, install the service manually.
- Manually: Click
 (the question mark button) and click the link to download the File System auditing service installer package. On each server you want to audit, install the service and start it.
 -
Automatically: Click
 (the Add server button). In the dialog that opens, provide administrator credentials and click
  . Cygna Auditor will look up for servers and show the list of available servers. Select servers you want to audit and click Install.
Note: On these servers, enable the following inbound firewall rules: Netlogon Service (NP-In), File and Printer Sharing (SMB-In), and File Server Remote Management (SMB-In).
- Manually: Click
Note: Data collection won't start until you create an alert. Follow the steps described in Step 3. Configuring Alerts and Scope to add an alert.
Step 3. Configuring Alerts and Scope
The first alert you create defines the auditing scope—folders to be audited and events to be tracked. For this tutorial, we are going monitor a single folder and a single action. In most cases, you'll want to include more events into your primary alert.
- On the Cygna Auditor home page, select System Configuration / System and provide your SMTP server details. Cygna Auditor will use these settings to send alert emails.
-
On the Cygna Auditor home page, select File System / Alerts, and then click Create.
-
In the General tab, specify the alert name and description. For example: File renamed.
-
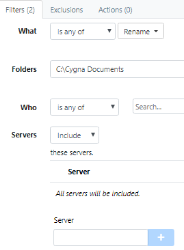
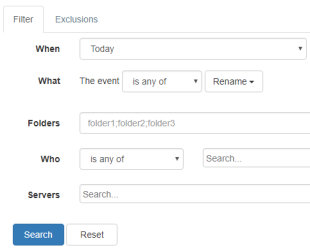
Complete the fields in the Filter tab as follows—set the What filter to "Rename" and Folder to "C:\Cygna Documents".
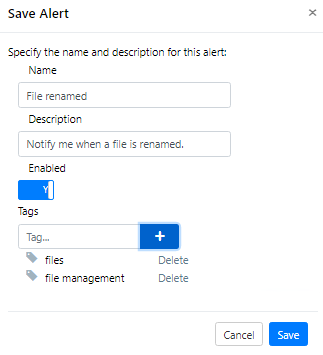
- In the Actions tab, specify your email address as recipient. Click Save to add the alert.
-
In the Save Alert dialog, specify the alert name (e.g., File renamed) and description. Also, you can apply tags to your alert. For example:


Step 4. Making Test Changes
Make test changes—for example, create a test txt file named Tutorial and then rename it in Cygna Tutorial.

Step 5. Seeing Cygna Auditor in Action
After waiting for 15 minutes for Cygna Auditor to process the event, start exploring how the test change you made is reported by Cygna Auditor. For more information on product functionality, refer to Key Features.
With Cygna Auditor, you can keep track of changes in your environment. The auditing features can be used interchangeably while bringing you the same level of transparency and security. Below you can see how to achieve the same results using different product features.
- Go to File System / Search.
-
Construct a search query. Set the What filter to "Rename" and the When interval is set to "Today". This search query will show renamed files.
-
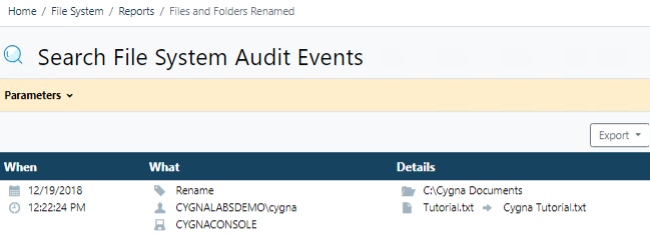
Click Search. Cygna Auditor will show you the following change record:

As you can see, the Tutorial.txt file was renamed into Cygna Tutorial.txt.


- Go to File System / Reports.
-
Select the Files and Folders Renamed report.

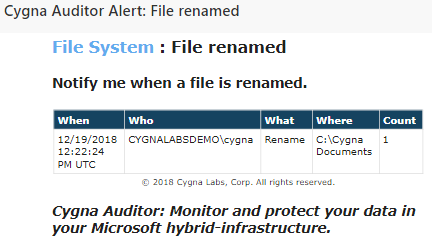
Check your mailbox to see the alert notification.
Recommended reading:
Tutorial: Getting Started with Active Directory—See Cygna Auditor in Action
